
Eye Makeup Step by Step: Your Ultimate Guide
Creating stunning eye makeup can transform your entire look, highlighting your natural beauty and expressing your personal style. Whether you’re preparing for a casual day out or a glamorous evening event, mastering the art of eye makeup is essential. This comprehensive guide will walk you through each step of eye makeup application, from preparation to finishing touches, providing tips and techniques to help you achieve flawless results every time.
Table of Contents
- Understanding Your Eye Shape
- Essential Eye Makeup Tools and Products
- Preparing Your Eyes
- Step-by-Step Eye Makeup Application
- Primer
- Eyeshadow
- Eyeliner
- Mascara
- Eyebrows
- Tips for Different Eye Shapes
- Creative Eye Makeup Looks
- Common Mistakes to Avoid
- Maintenance and Removal
- Frequently Asked Questions
- Conclusion
1. Understanding Your Eye Shape
Before diving into application techniques, it’s important to understand your eye shape, as different shapes can influence how makeup appears and what techniques suit you best.
Common Eye Shapes:
- Round Eyes: Larger, more open appearance; visible whites around the iris.
- Almond Eyes: Symmetrical, with a slightly pointed outer corner.
- Hooded Eyes: Excess skin folds over the crease, making the lid less visible.
- Monolid Eyes: No visible crease; eyelid appears flat.
- Downturned Eyes: Outer corners turn downward.
- Upturned Eyes: Outer corners are higher than inner corners.
- Close-Set Eyes: Eyes are positioned closer together.
- Wide-Set Eyes: Eyes are spaced farther apart.
Tip: Tailoring your eye makeup to your eye shape enhances your natural features and creates a balanced look.
2. Essential Eye Makeup Tools and Products
Having the right tools and products is fundamental for achieving professional-looking eye makeup.
Tools:
- Eye shadow brushes (flat, fluffy, angled)
- Precision eyeliner brush
- Blending brush
- Eyelash curler
- Tweezers
- Small detail brush
- Cotton swabs/q-tips
Products:
- Primer or eyeshadow base
- Eyeshadow palette (neutral, colorful, shimmer, matte)
- Eyeliner (gel, pencil, liquid)
- Mascara
- Eyebrow pencil or powder
- Eyebrow gel or pomade
- False eyelashes (optional)
- Eyelash glue
3. Preparing Your Eyes
Preparation ensures smooth application and long-lasting makeup.
Step 1: Cleanse and Moisturize
Start with a clean face. Use a gentle cleanser around your eyes, then apply a lightweight moisturizer or eye cream to hydrate the skin.
Step 2: Apply Eye Primer
Apply a thin layer of eye primer or eyeshadow base over your eyelids. This helps eyeshadow adhere better, intensifies colors, and prolongs wear.
Tip: Use your ring finger to gently tap in the primer for even coverage.
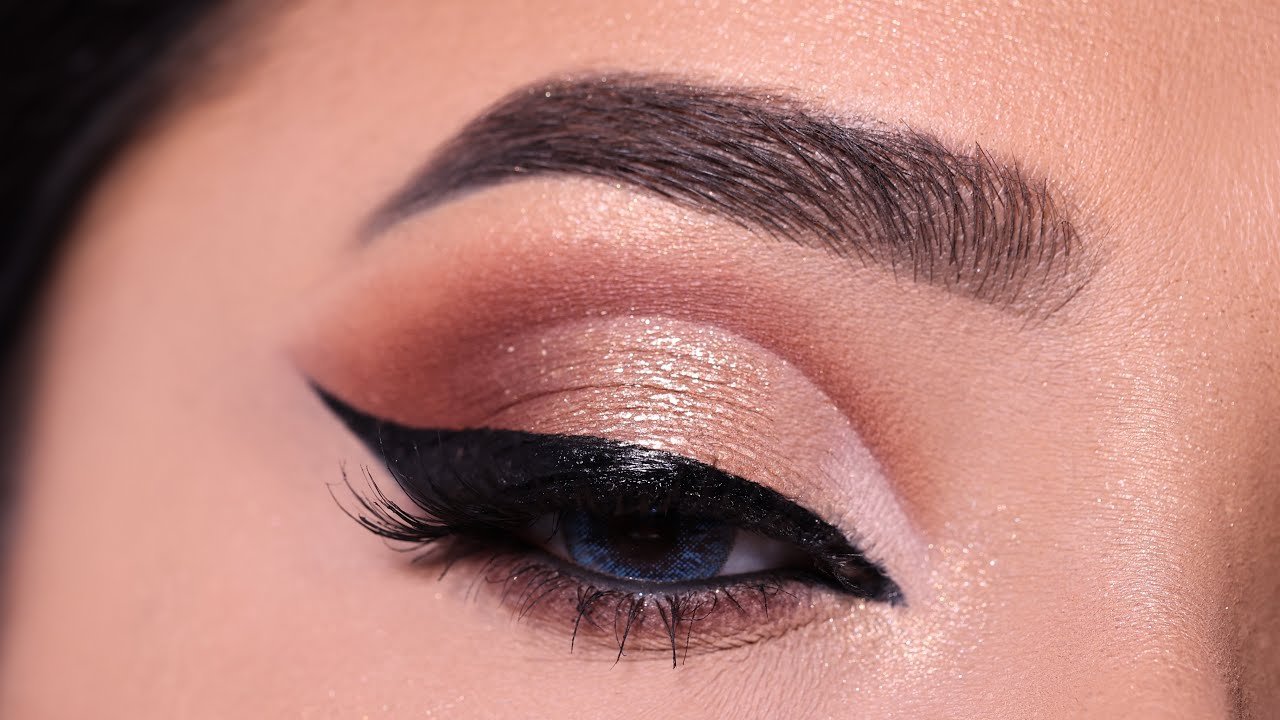
4. Step-by-Step Eye Makeup Application
A. Eyeshadow Application
Step 1: Choose Your Palette
Select shades based on the occasion, your eye color, and personal preference.
Step 2: Transition Shade
Pick a matte neutral shade slightly darker than your skin tone. Using a fluffy brush, apply this to your crease in windshield-wiper motions. This acts as a transition color and helps blend other shades seamlessly.
Step 3: Crease Color
Use a slightly darker shade to deepen the crease. Focus on defining the eye shape:
- For round eyes, apply slightly above the crease to lift the eye.
- For hooded eyes, keep the crease color slightly above the natural crease to create depth.
Step 4: Lid Shade
Apply a lighter or shimmer shade on your eyelid:
- For daytime, neutral matte or satin shades work well.
- For evening looks, opt for shimmer or metallic shades.
Use a flat brush for precise application and pack the color onto the lid.
Step 5: Outer Corner
Darken the outer corner with a deeper shade to add dimension:
- Use a small, fluffy brush.
- Focus on the outer V (corner) and blend inward.
Step 6: Inner Corner and Brow Bone
Highlight the inner corner and brow bone with a light, shimmery shade to brighten the eyes.
Blending is Key
Use a clean, fluffy brush to blend the transition between shades seamlessly, avoiding harsh lines.
B. Eyeliner Application
Eyeliner accentuates your eye shape and adds definition.
Types of Eyeliner:
- Pencil: Easy for a natural or smoky look.
- Gel: Precise and long-lasting.
- Liquid: Sharp lines and dramatic effects.
Application Steps:
- Start from the inner corner, drawing a thin line along the lash line.
- Gradually thicken the line toward the outer corner for a more dramatic effect.
- For a winged look:
- Draw a small line outward from the outer corner following your lower lash line’s angle.
- Connect the tip to the lash line and fill in.
- Use a small brush or cotton swab to clean any mistakes.
Tip: Keep your eyes open during application to ensure the eyeliner complements your eye shape.
C. Mascara Application
Mascara opens up the eyes and enhances the eyelashes.
Steps:
- Use an eyelash curler to lift your lashes.
- Remove excess product from the wand.
- Wiggle the wand at the base of your lashes and sweep upward.
- Apply multiple coats for volume, but avoid clumping.
- Use a clean spoolie or lash comb to separate lashes if needed.
Tip: For a more dramatic look, consider applying false eyelashes.
D. Eyebrows
Well-groomed eyebrows frame the eyes and complete the look.
Steps:
- Brush brows upward with a spoolie.
- Fill in sparse areas with an eyebrow pencil or powder, following your natural brow shape.
- Define the arch for a lifted appearance.
- Set with eyebrow gel for hold.
5. Tips for Different Eye Shapes
Round Eyes
- Use darker shades on the outer corner and lighter shades on the inner corner.
- Extend eyeliner slightly beyond the outer corner for elongation.
- Focus on winged eyeliner to lift the eye.
Almond Eyes
- Experiment with various looks; most styles suit almond eyes.
- Emphasize the crease with darker shades.
- Try cat-eye eyeliner for a dramatic effect.
Hooded Eyes
- Keep eyeshadow above the crease to create the illusion of larger lids.
- Use matte shades to avoid creasing.
- Opt for subtle eyeliner to define without overwhelming.
Monolid Eyes
- Use gradient eyeshadow with darker shades in the outer corner.
- Focus on eyeliner to define the shape.
- Avoid heavy eyeshadow; instead, use shimmer on the lid for brightness.
Downturned Eyes
- Apply eyeliner slightly upward at the outer corner.
- Use eyeshadow to lift the appearance.
- Avoid heavy eyeliner on the lower lash line.
Upturned Eyes
- Balance the look with winged eyeliner.
- Highlight the inner corner and brow bone.
6. Creative Eye Makeup Looks
Once comfortable with basic techniques, explore creative styles:
- Smokey Eye: Blended dark shades for a sultry look.
- Cut Crease: Precise crease line with contrasting lid color.
- Colorful Looks: Bright hues, color blocking, or rainbow effects.
- Glitter and Shimmer: For festive or evening looks.
- Graphic Lines: Bold shapes using eyeliner.
7. Common Mistakes to Avoid
- Not blending shades properly.
- Using too much product, causing clumping or fallout.
- Applying eyeliner unevenly.
- Forgetting to set the eyeshadow with translucent powder.
- Ignoring your eye shape when choosing styles.
- Overdoing the mascara or applying too many coats.
8. Maintenance and Removal
Maintenance
- Clean brushes regularly.
- Replace expired products.
- Use gentle, oil-free makeup removers to preserve skin.
Removal
- Use a gentle makeup remover or micellar water.
- Soak a cotton pad and hold it on your closed eyes for a few seconds.
- Gently wipe away makeup without rubbing.
- Follow with a gentle cleanser and moisturizer.
9. Frequently Asked Questions
Q1: How do I make my eyes appear larger?
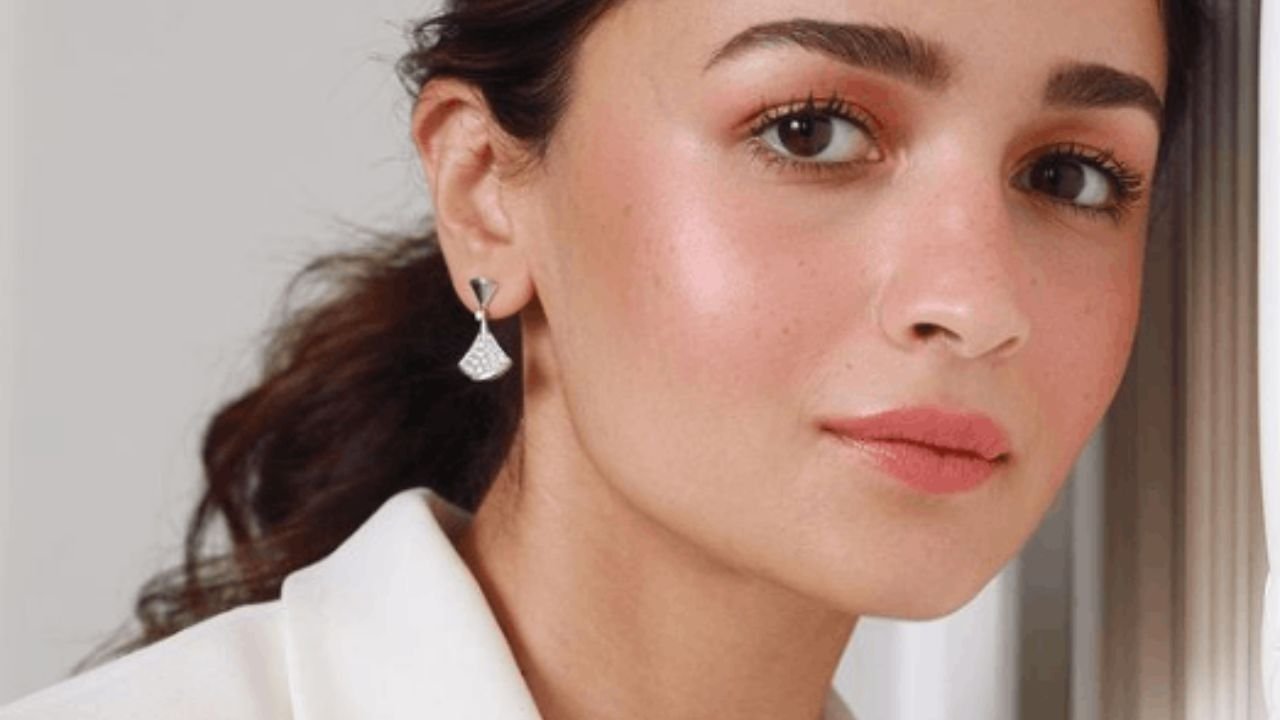
A: Use light eyeshadows on the lid, highlight the inner corner, apply mascara generously, and consider winged eyeliner.
Q2: Can I wear bold eye makeup daily?
A: Yes, but balance with neutral lips and minimal face makeup for an everyday look.
Q3: How long does eye makeup last?
A: Properly applied and set with primer, it can last 8-12 hours; using waterproof products helps longevity.
Q4: What’s the best way to prevent eyeshadow fallout?
A: Use a good primer, tap off excess product before applying, and do eye makeup before face makeup.
10. Conclusion
Mastering eye makeup step by step allows you to express your creativity, enhance your natural features, and boost your confidence. Practice makes perfect—experiment with different shades, techniques, and styles to discover what works best for your eye shape and personal aesthetic. Remember to invest in quality tools and products, prep your eyes properly, and blend diligently for seamless results. With patience and dedication, you’ll be able to create stunning eye looks that turn heads and make you feel fabulous every day.
Related Post

Homemade Hand Scrub for Soft & Smooth Skin
Introduction Our hands are our most used body parts. They assist us in everyday tasks, [...]
Top 8 Ways to Perfect Your Makeup for a White Dress
Introduction A white dress exudes elegance, purity, and timeless beauty. Whether you’re attending a wedding, [...]

Additional Things To Consider for Your First Makeup Kit
1. Skin Type Compatibility 2. Skin Tones and Undertones 3. Quality and Safety 4. Budget [...]